1. Apache, MySQL, PHP 설치하기
1. Apache 설치하기
- 윈도우용 Apache Download ( 저는 apache_2.2.14-win32-x86-openssl-0.9.8k.msi 를 받았습니다. )
- Run the Apache Installer

- Network Domain 및 Server Name 을 모두 “localhost“로 입력한다.
- Email 은 관리자 Email을 준다.
- 기존 설치환경이려면 “시작 -> 프로그램 -> Apache HTTP Server 2.2 -> Configure Apache Server -> Edit the Apache httpd.conf Configuration File” 에서 직접수정하면 된다.
- Firefox 웹 브라우져에서 “http://localhost”를 입력하고 Apache 실행을 Test한다.
- Apache 설치가 이상없이 되었다면 httpd.conf 에서 DocumentRoot 를 eclipse의 workspace로 변경해준다.
- 이때 주의 할점은 윈도우의 를 /로 변경해줘야 한다는 것이다. 즉 D:workspace 라면 D:/workspace 로 변경해서 입력해야 한다.
- 또한 DocumentRoot “D:/workspace” 외에 바로 아랫부분에 있는
#
# This should be changed to whatever you set DocumentRoot to.
#
<Directory “C:/Program Files/Apache Software Foundation/Apache2.2/htdocs”>
부분도
#
# This should be changed to whatever you set DocumentRoot to.
#
<Directory “D:/workspace”>
로 변경해줘야 한다. 그렇지 않으면
Forbidden
You don’t have permission to access / on this server.
오류가 난다.
- httpd.conf 값을 변경한 후에는 “시작 > 프로그램 > Apache HTTP Server 2.2 > Monitor Apache Servers” 에서 Apache를 Restart 해줘야 반영된다.
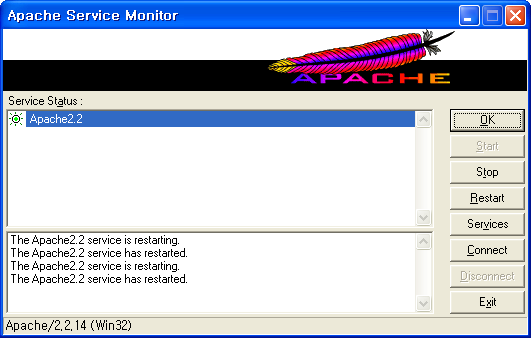
- Monitor Apache Servers 화면
2.PHP Install & Configuration
- 윈도우용 PHP Download ( 저는 php-5.3.1-Win32-VC9-x86.zip을 다운받았습니다. )
- 이유는 모르겠지만 Installer 파일을 설치하면 자꾸 down 되서 zip 파일을 다운받았습니다. 시간이 되면 이부분도 다시한번 확인해보로록 하겠습니다.
- Down 받은 파일을 d:/php 에 풀어줍니다.
- d:phpphp.ini-development 파일을 php.ini로 복사
- php.ini 파일에서 다음부분을 수정한다.
- ; extension_dir = “ext” => extension_dir = “d:/php/ext”
- ;extension=php_gd2.dll => extension=php_gd2.dll
- ;extension=php_mbstring.dll => extension=php_mbstring.dll
- ;extension=php_mysql.dll => extension=php_mysql.dll
- ;extension=php_mysqli.dll => extension=php_mysqli.dll
- php.ini Save
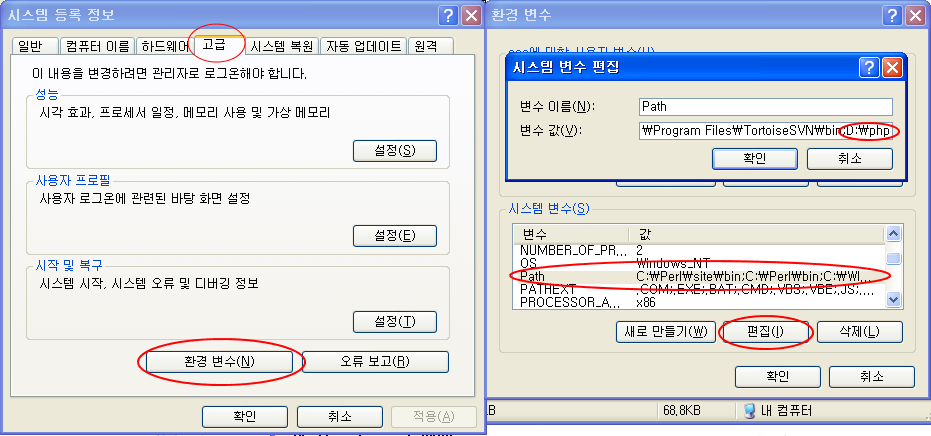
- PHP Path 환경변수 등록
- Config Apache (httpd.conf 를 다음과 같이 수정한다)
#LoadModule rewrite_module modules/mod_rewrite.so =>LoadModule rewrite_module modules/mod_rewrite.so- 다음을 Config File에 추가
#PHP5
              LoadModule php5_module "D:/php/php5apache2_2.dll"
              PHPIniDir "D:/php"
AddType application/x-httpd-php .php
AddType application/x-httpd-php-source .phpsDirectoryIndex index.html index.php
3. MySQL 설치하기
-
- MySQL은 압출파일을 가지고 설치하는 방법을 살펴보겠습니다. ( 실은 Installer 설치에 계속 문제가 있어서요. 원인은 모르겠습니다. )
- 먼저 D:mysql Directory에 다운받은 Mysql(mysql-noinstall-5.1.41-win32.zip) 압축을 풀어준다.
- MySQL Option 파일 설정
- Option Sample 파일 결정 : MySQL에는 my-small, my-medium, my-large.cnf 그리고 my-huge.cnf 있으며, 기본적으로 small, medium, large, 그리고 very large system에 적용하면 무난하다. 이때 Windows 시스템에서는 .cnf 보다
.ini를 사용하는게 바람직하며 Option 파일의 위치는 MySQL 설치 Directory에 복사하면 된다. ( Windows에서 Binary 설치일경우 ) - my.ini 에서 다음 부분을 수정해준다.
- Option Sample 파일 결정 : MySQL에는 my-small, my-medium, my-large.cnf 그리고 my-huge.cnf 있으며, 기본적으로 small, medium, large, 그리고 very large system에 적용하면 무난하다. 이때 Windows 시스템에서는 .cnf 보다
[mysqld] 에서 설치 Directory와 Data Directory 를 지정해준다.
[mysqld]
# set basedir to your installation path
basedir=E:/mysql
# set datadir to the location of your data directory
datadir=E:/mydata/data
-
-
- MySQL Server Type 을 결정해준다. mysql를 설치할경우 mysqld를 사용하면 된다.
- mysqld : Optimized binary with named-pipe support
- mysqld-debug : Like mysqld, but compiled with full debugging and automatic memory allocation checking
- MySQL Server Type 을 결정해준다. mysql를 설치할경우 mysqld를 사용하면 된다.
-
-
-
- Start Server : Window DOS Command 창을 열어다 다음을 실행시켜준다.
-
-
-
-
-
D:mysqlbin>mysqld –console
InnoDB: The first specified datafile c:ibdataibdata1 did not exist:
InnoDB: a new database to be created!
InnoDB: Setting file c:ibdataibdata1 size to 209715200
InnoDB: Database physically writes the file full: wait...
InnoDB: Log file c:iblogsib_logfile0 did not exist: new to be created
InnoDB: Setting log file c:iblogsib_logfile0 size to 31457280
InnoDB: Log file c:iblogsib_logfile1 did not exist: new to be created
InnoDB: Setting log file c:iblogsib_logfile1 size to 31457280
InnoDB: Log file c:iblogsib_logfile2 did not exist: new to be created
InnoDB: Setting log file c:iblogsib_logfile2 size to 31457280
InnoDB: Doublewrite buffer not found: creating new
InnoDB: Doublewrite buffer created
InnoDB: creating foreign key constraint system tables
InnoDB: foreign key constraint system tables created
011024 10:58:25  InnoDB: Started
-
-
-
                       mysql: ready for connections
                       Version: '5.1.42'  socket: ''  port: 3306
-
-
-
- mysql Server에 접속해서 확인한다.
-
-
C:mysqlbin>mysql
Welcome to the MySQL monitor. Commands end with ; or g.
Your MySQL connection id is 1 to server version: 4.0.18-nt
Type ‘help;’ or ‘h’ for help. Type ‘c’ to clear the buffer.
mysql>
C:mysqlbin> mysqladmin -u root shutdown
-
-
- Install Server as Server
C:mysqlbin> mysqld --install
- Remove Server
C:mysqlbin> mysqld --remove
- Install Server as Server
-
PHP Connection test <?php // hostname or ip of server (for local testing, localhost should work) $dbServer='localhost'; // username and password to log onto db server $dbUser='root'; $dbPass=''; // name of database $dbName='test'; $link = mysql_connect("$dbServer", "$dbUser", "$dbPass") or die("Could not connect"); print "Connected successfully<br>"; mysql_select_db("$dbName") or die("Could not select database"); print "Database selected successfully<br>"; // close connection mysql_close($link); ?>
